How to find what is filling your Mac, and free space safely
The built in tools find most of it. Here is what is safe to delete, what is not, and the commands I checked first.
TL;DR
- Most of a full Mac is five things: caches, old downloads, developer leftovers, big media and apps you stopped using. You can find all of them with Finder and four Terminal commands.
- Delete things you can name. Leave alone anything you cannot, and never touch the top level of the Library folder.
- Move things to the Trash first, check the Mac still works for a day, then empty it. A cleaner app is not needed for any of this.
Find a large file without using Terminal
Open System Settings, then General, then Storage and inspect the largest category. In Finder, select a candidate file and check its name, location and size before deciding what to do with it. Start with a used installer or another file you can identify, rather than an unfamiliar folder in Library.
If it is a document, recording or photo you might need, keep another copy before removing the original. If it belongs to an app, use that app’s storage controls or uninstaller instructions where available. A large folder is not evidence that its contents are disposable.
Move a file to the Trash first. Check that you no longer need it before emptying the Trash, because removing it permanently is a separate decision. Space still occupied by items in the Trash may not be reclaimed until it is emptied. The command examples later in this article are an optional way to inspect more detail; they are not required for this first pass.
Read the Storage screen
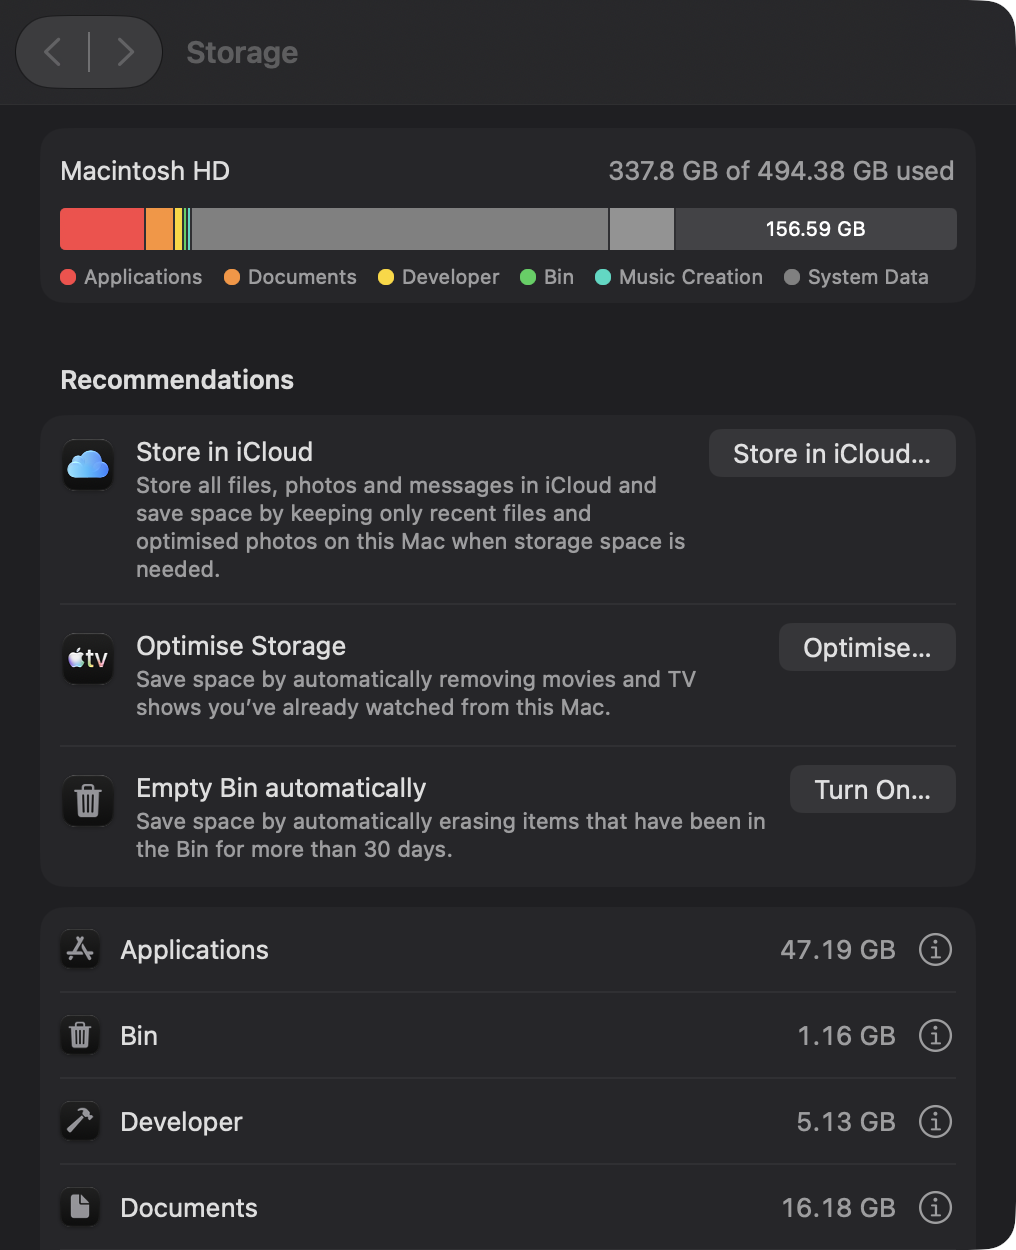
Open System Settings, then General, then Storage. The bar at the top splits your disk into colored parts: Applications, Documents, Photos, Developer, System Data and so on. Under it is a list with a size for each.
Two things are worth knowing before you act on it.
First, the numbers can lag. macOS calculates this screen in the background, and right after you delete something the bar can still show the old size. If it looks wrong, wait a minute and reopen the screen.
Second, System Data is a catch all. It is the part macOS could not put in another box. It holds caches, logs, local Time Machine snapshots, virtual machine images, and files from apps that do not say what they are. A large System Data number does not mean macOS itself is large. It usually means caches and snapshots, and both can be inspected, which is the rest of this post.
A free space figure also depends on what you count. Finder shows “available” space, which includes space the system can reclaim by itself (purgeable files). The Terminal command below shows the plain number.
df -h /System/Volumes/DataOn the volume that holds your files, the Used and Avail columns are the honest ones. Note the Avail number now. You will compare against it at the end.
Find the big folders
The fastest way to find what is big is to look at sizes one folder at a time, starting at the top and going down only into the biggest one. This is the same idea every disk tool uses. You can do it in Finder or Terminal.
In Finder, open your home folder, press Command and J, and tick “Calculate all sizes”. Switch to list view and click the Size column. Now every folder shows its size, and the biggest sort to the top. Open the biggest and repeat.
In Terminal, du does the same thing. This prints the size of every item in your home folder, smallest to largest:
du -sh ~/* 2>/dev/null | sort -hWhat each part does: du reports disk usage. -s gives one total per item instead of every file. -h prints sizes people can read (5.4G rather than a count of blocks). ~/* means every visible item in your home folder. 2>/dev/null hides permission errors for folders you cannot read. sort -h sorts by human sizes, so 900M comes before 5G.
On the Mac I used to check these commands, the tail of that output looked like this (folder names shortened):
595M	~/Desktop
5.4G	~/Downloads
 15G	~/infra
 35G	~/Documents
 63G	~/Library
The last line is the usual surprise. The Library folder is hidden in Finder by default, which is why people do not know it is the biggest thing they own. Go one level down:
du -sh ~/Library/* 2>/dev/null | sort -h | tail -8On that Mac, ~/Library/Caches alone was 43 GB and ~/Library/Logs was 81 MB. The caches were two thirds of the Library folder. That is common, and it is the next section.
To find single big files rather than folders, Spotlight can list them from Terminal:
mdfind -onlyin ~ 'kMDItemFSSize > 1000000000'That lists every file over one gigabyte under your home folder. It found an Android emulator image and a log file that had grown for months, both of which I had forgotten about.
Safe and unsafe places, one by one
This is the part to bookmark. For each place: what it is, how to check its size, how to clear it, and what happens if you get it wrong.
| Place | What it is | Check the size | Safe to clear? | If you are wrong |
|---|---|---|---|---|
~/Library/Caches | Files apps keep so they start faster | du -sh ~/Library/Caches | Yes, the contents of single app folders. Quit the app first | The app is slower once while it rebuilds |
~/Library/Logs | Text logs from apps | du -sh ~/Library/Logs | Yes | Nothing, unless you need an old log to debug |
~/Downloads | Whatever you downloaded | Finder, sort by size | Yes, after you look | You re download it, if it was still online |
| Xcode DerivedData | Build output for projects | du -sh ~/Library/Developer/Xcode/DerivedData | Yes | The next build is a full build |
| Xcode iOS DeviceSupport | Symbols for each iPhone and iOS version you connected | du -sh ~/Library/Developer/Xcode/iOS\ DeviceSupport | Yes | Xcode re copies symbols next time you connect that phone |
| iPhone and iPad backups | Local device backups | du -sh ~/Library/Application\ Support/MobileSync/Backup | Only if you have another backup | You lose the only copy |
| Mail downloads | Attachments Mail cached | Finder, Mail folder in Library | Mostly. Use Mail’s own option instead of deleting by hand | Attachments download again from the server |
| Homebrew | Old versions of packages | brew cleanup -n | Yes | You reinstall a package |
node_modules folders | Dependencies of JavaScript projects | find ~ -name node_modules -prune -maxdepth 5 | Yes, in projects you are not working on | npm install rebuilds it |
| Docker images and volumes | Container storage | docker system df | Images yes, volumes only if you know what is in them | A database in a volume is gone |
| Time Machine local snapshots | Hourly backups kept on your disk | tmutil listlocalsnapshots / | Usually leave them. They release space themselves | You lose a restore point |
Some notes on the rows that need more than a line.
Caches. Clear the inside of one app’s folder at a time, and only for an app you have quit. Do not select everything in the Caches folder and delete. Some apps keep state there that is not a cache, and a few system services expect their folder to exist. If you delete a whole app folder and it comes back, that is fine. If you are unsure about a folder, leave it. Restarting the Mac also empties several system caches on its own.
Xcode. DerivedData is the safe one. On the Mac I checked it was 433 MB. On a Mac with many projects it is often much larger. In Xcode you can also open Settings, then Locations, and use the arrow next to Derived Data to jump to it. iOS DeviceSupport was not present on my Mac. It appears once you connect a phone, and old versions stay forever.
Homebrew. The command brew cleanup -n is a dry run. The -n means “show me, do not do it”. On my Mac it said:
Would remove: /opt/homebrew/Library/Homebrew/vendor/portable-ruby/4.0.6 (1,707 files, 34.6MB)
==> This operation would free approximately 69.2MB of disk space.
Small, because I clean often. Drop the -n to run it for real. Homebrew only removes old versions it has already replaced.
Time Machine snapshots. List them with tmutil listlocalsnapshots /. On my Mac the list was empty. If you have some, macOS removes them on its own when space gets low, so they rarely need deleting by hand. The one case to act is when you need space right now and the snapshots are large.
Docker. docker system df prints a table of what images, containers and volumes use. docker image prune removes images no container uses. Be careful with volumes, because a volume can hold a database that exists nowhere else.
Photos and iPhone backups. These are the two places where “just delete it” loses something you cannot get back. Check the date on a backup before removing it, and confirm you have another one.
Old downloads and duplicates
Downloads is where forgotten disk images, installers and zip files pile up. Open the folder in Finder, list view, sort by Size. Anything ending in .dmg, .pkg or .zip that you already installed or extracted is safe to remove. On my Mac the folder was 5.4 GB.
Finder can also show files by age. In a Finder window press Command and F, set the search to “This Mac” or your home folder, then add the rules Kind is Disk Image and Last opened is before a date. That finds installers you never opened again.
True duplicates are harder. Two files with the same name are not necessarily the same file, and two files with different names can be identical. The reliable method compares content:
- Group files by size. Files of different sizes cannot be identical.
- For groups with the same size, compute a checksum of each file.
- Files with the same checksum are the same content.
You can do this by hand for one folder. Run shasum -a 256 on the files you suspect:
shasum -a 256 ~/Downloads/report.pdf ~/Downloads/report\ copy.pdfIf the two lines start with the same long string, the files are identical and one can go. Doing this across a whole disk by hand is slow, which is the honest reason duplicate finders exist.
One trap: a hard link is the same file stored under two names, and deleting one does not free any space. A good duplicate finder skips them. A quick tool that does not will report space you will never get back.
Big photos and videos: shrink, do not delete
Photos and screen recordings are often the largest personal files, and you rarely want to lose them. The better move is to make them smaller.
For video, a screen recording saved at full quality can be many times larger than it needs to be. Re encoding to H.264 or HEVC at a sensible quality usually cuts the size a lot with no visible change at normal viewing size. How much depends on the file, so measure on yours. I do not have a fair number to give you for every kind of recording.
For a quick check with the tools already on your Mac, open the video in QuickTime Player, choose File, then Export As, and pick a smaller resolution. Compare the two sizes in Finder before you delete the original, and keep the original until you have watched the new one.
For photos, Photos has a setting called Optimize Mac Storage. It keeps small versions on the Mac and the full originals in iCloud. That only helps if you pay for iCloud storage and trust it, so it is a choice and not a free win.
Apps and what they leave behind
Dragging an app from Applications to the Trash removes the app, but not everything it made. The leftovers live in your Library folder:
| Folder | What is in it |
|---|---|
~/Library/Application Support/<App name> | The app’s data |
~/Library/Caches/<bundle id> | Its cache |
~/Library/Preferences/<bundle id>.plist | Its settings |
~/Library/Containers/<bundle id> | The data of sandboxed apps |
To see which apps are big, open Storage in System Settings and click Applications, or sort the Applications folder by size in Finder.
Before deleting leftovers, make sure you really are done with the app. The settings and data in those folders are what you would want back if you ever reinstall. A few megabytes of preferences is not worth the risk. A multi gigabyte data folder for an app you have not opened in two years is.
What to leave alone
A short list, because the dangerous mistakes are few.
| Leave alone | Why |
|---|---|
/System, /usr, /bin, /sbin | macOS owns these. Modern macOS protects most of it, but do not try to delete from there |
The top level of ~/Library | Go into it to clear one app’s folder. Never delete whole folders such as Application Support, Preferences or Containers |
| Anything you cannot name | Search its name before touching it. If that does not make it clear, leave it |
Paths typed from memory after sudo rm -rf | One wrong character in a path is how people lose a disk |
| Your only copy of anything | Check that another copy exists before removing a folder of photos, documents or a backup |
Doing this in the notch with NotchStar
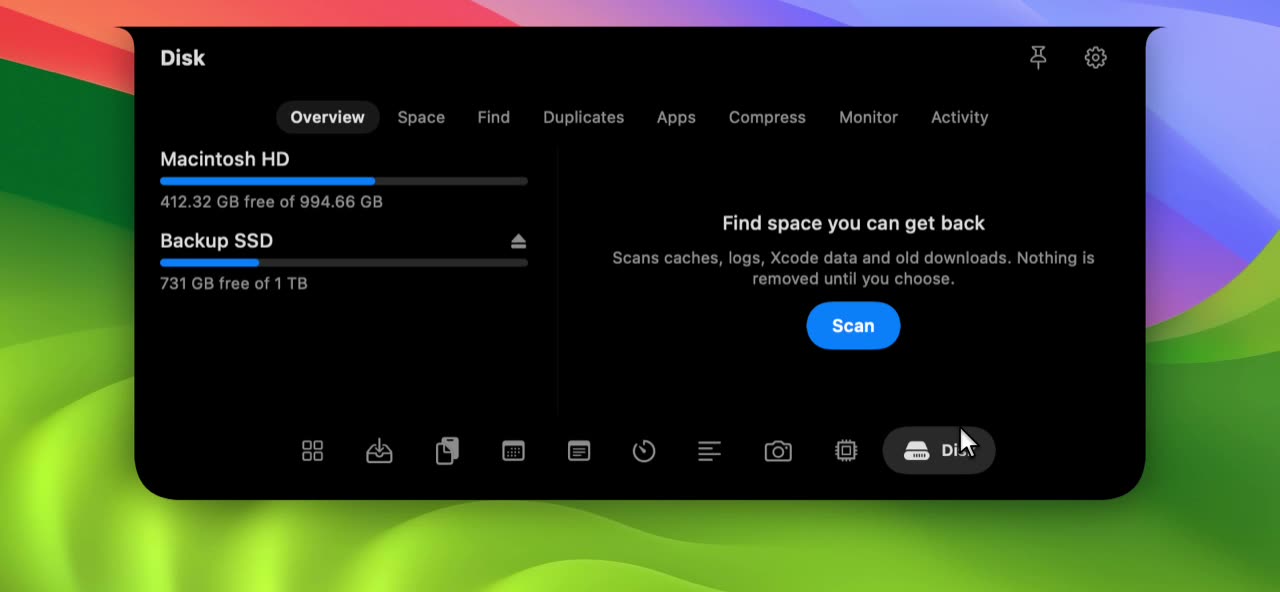
I built the same steps into NotchStar’s Disk tool, so I could do them without opening Terminal. It is one of the ten tools in the notch, and this section describes what it does and what it does not do.
What it does: it sorts what it finds into sections for space, find, duplicates, apps, compress, monitor and activity. It lists the biggest folders and files under your home folder, finds duplicates by comparing file size first and a SHA 256 checksum second, skips hard links, lists installed apps by size, can shrink video and photos, shows which processes use the most CPU and memory, and keeps a log of every action it took.
What it does not do: it never deletes for good. Everything goes to the Trash, so you can put it back. It only acts inside your home folder and on app bundles in /Applications, and it refuses anything closer to the system than that. A scan starts only when you press the button, so nothing runs in the background. It does not draw a full map of your disk like a dedicated disk analyzer does. If you want a visual treemap of everything, a tool built for that does it better.
The safety rules are in one small file, DiskSafety.swift, and tests cover them, so you can read exactly what is allowed. NotchStar costs $4 once, with a 7 day free trial. Prices as of 7 October 2026.
A 20 minute routine you can follow
Do this once, then again every few months. Have the Trash ready, and do not empty it until the end.
- Note the starting number. Run
df -h /System/Volumes/Dataand write downAvail. (1 minute) - Look at Storage. Open System Settings, General, Storage. Note which category is largest. (2 minutes)
- Find the big folders. Run
du -sh ~/* 2>/dev/null | sort -h, then go into the biggest folder with the same command. (3 minutes) - Check the Library. Run
du -sh ~/Library/* 2>/dev/null | sort -h | tail -8. If Caches is large, open it in Finder, sort by size, and trash the folders of apps you have quit and recognize. (4 minutes) - Clean Downloads. Sort by size. Trash installers you already used. (3 minutes)
- Developer leftovers. If you use Xcode, trash DerivedData. If you use Homebrew, run
brew cleanup -nand thenbrew cleanup. (2 minutes) - Find huge single files. Run the
mdfindcommand from earlier and decide on each. (2 minutes) - Use the Mac for a day. If everything works, empty the Trash. (1 minute, next day)
- Check the result. Run
df -h /System/Volumes/Dataagain and compareAvailwith step 1. (1 minute)
Cheat sheet
Save this part.
- Wrote down free space with
df -h /System/Volumes/Data - Read Storage in System Settings, and know what System Data is
- Found the biggest folders with
du -sh ~/* 2>/dev/null | sort -h - Looked inside
~/Libraryone level only - Trashed caches for apps I quit and recognize
- Cleaned Downloads of used installers
- Cleared Xcode DerivedData and ran
brew cleanupif I use them - Checked for files over 1 GB with
mdfind - Did not touch system folders or anything I cannot name
- Waited a day before emptying the Trash
- Compared free space against the first number
| Command | What it tells you |
|---|---|
df -h /System/Volumes/Data | Real used and available space |
du -sh ~/* 2>/dev/null | sort -h | Size of each item in your home folder |
mdfind -onlyin ~ 'kMDItemFSSize > 1000000000' | Files over 1 GB |
brew cleanup -n | Dry run of Homebrew cleanup |
tmutil listlocalsnapshots / | Local Time Machine snapshots |
docker system df | Docker space use |
shasum -a 256 file1 file2 | Whether two files are identical |
What is still hard
- A full disk map is genuinely easier in a dedicated tool. The commands here find the big folders, but a picture of nested sizes is faster to read.
- “How big is purgeable space” is not a number I can give you. macOS decides what is purgeable and when, and it differs between Macs.
- I checked these commands on macOS on one Mac. Folder names such as the Xcode ones have changed between versions before. If a path does not exist on yours, that is the answer, not an error.
If you want to try the Disk tool, it is at notchstar.com. If something in this post is wrong for your Mac, tell me at hello@notchstar.com and I will fix the post.
NotchStar is a native Mac notch app, $4 once, with a 7 day free trial. Try it, or read the ten tools.